 plb
plb
Docker for beginners
31 Aug 2015
Nowadays there is a lot of talk around docker in the geek world, indeed, this technology is increasing and every day new companies are embrancing it. Docker became almost a required knowledge for developers and sysadmins.
Thinking about it, we want to create a sequence of posts to try to cover the subject in the best way. In this first post we would like to answer the basic questions, showing the main concepts, how to install and administrate a docker environment.
I hope you enjoy the content of this text and if you have questions, sugestions or complains, just leave a comment and we’ll try to answer as soon as possible.
Basic Concepts
Before we start talking about Docker we have to keep in mind two basic concepts: Linux Containers (LXC) and Virtual Machines (VMs). They always appear in papers related to docker.
Technology companies started adopting virtual machines a long time ago and I believe that is not a new concept for you. But what is LXC? What is the difference between virtual machines and linux containers?
LXC is a virtualization in operating system level, it is used to run multiple isolated Linux systems, it makes use of kernel features such as cgroups and namespaces. These isolated environments are known as containers. The kernel cgroups feature allows resource sharing such as: CPU, memory and network. The namespace creates an isolation for containers, in other words it ensures that a container can’t see or impact another.
When we build a virtual machine we have a complete system, with its own libraries, kernel and binary. It means that we have a copy of a isolated physical machine. However LXC works in a different way, because it uses the hosts’ resource, such as: libs, kernel and binaries. As a result, to build a container is faster, and lighter than a virtual machine.

The concept of cgroups and namespaces is much more complex than mentioned above. But our purpose is not to go deeper in these concepts, but rather show docker tool, which uses both features. If you have curiosity to know more about these them, a quick search on the internet will bring you great papers.
A bit of history
The Docker development started by Solomon Hykes and others engineers at dotCloud. At the beginning it was just an internal project to handle Linux Containers (LXC), then the developers realized the power they had in hand and they decided to open the project.
So, what is docker? “Docker containers wrap up a piece of software in a complete filesystem that contains everything it needs to run: code, runtime, system tools, system libraries – anything you can install on a server. This guarantees that it will always run the same, regardless of the environment it is running in.” (docker.com)
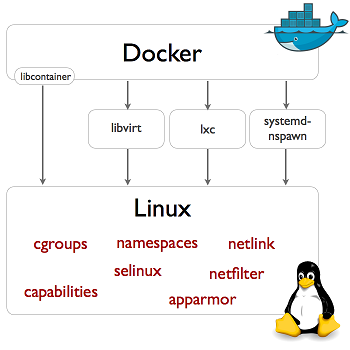
Although in the begging Docker used to make use of LXC to access the kernel’s virtualization features, since version 0.9, the tool uses libcontainer library which was developed by Docker company using Go language to do the same. Also Docker is still compatible with other interfaces (libvirt, LXC, systemd-nspwan). As shown in the figure below.
Docker Container
Every Docker Container is built from an image, and its life cycle consists in the execution of a process, thus while this process is running, the container also will run.
One container can run more than one process, but it isn’t a good practice. This concept is important to understand how to “Dockerize” your application.
Docker Image
They are read-only templates used to build containers. For instance, an Image would be the operational system ubuntu with a web server installed. The Image is characterized as read-only because from the moment you change it, it becomes another image. This concept will be more easily to understand when we start using Docker in the command line.
Docker Registry and Docker Hub
Imagine the following scenario: you work as a sysadmin in a company that is adopting Docker technology. Inside this environment, developers want to manipulate and share many images, based in different distributions and running different applications. They are creating new images and updating the ones that already exist all the time. Also, these images must be private. How to manage such task?
That is the reason docker registry exists, it is an open source project which allows you to save, share and manage your images in docker (in-house registry).
Docker Company provides a service of public registration, where users are able to save their images, known as Docker Hub. Further we will show how to download, change and publish an image in docker hub, but first you have to be registered into it.
How to install
To install it is not complicated, and it is possible to find a variety of articles teaching how to do it in the distribuition you like the most. Just be aware of the requeriments, such as:
- 64-bit installation regardless of your distribution version
- kernel must be 3.10 at minimum
The linux distribution used in this post was ubuntu 14.10. If you have an old kernel version I advise you to read at docker website.
To install docker we will need curl package.
$ sudo apt-get install curl
Now we can install Docker.
$ curl -sSL https://get.docker.com/ |sh
We will see this message when we finished docker installation: “If you would like to use Docker as a non-root user, you should now consider adding your user to the “docker” group with something like”.
$ usermod -aG docker <YOUR-USERNAME>
Remember that you will have to log out and back in for this to take effect!
Docker offers one test image that can be used to verify if the installation happened correctly. The name of it could not be different, “hello-world”. When you execute the command below you will be downloading the image and executing it in one container.
$ docker run hello-world
Starting with Docker
Sfter the download you probably have only the test image hello-world installed in you computer. With the command docker images you can see your images.
$ docker images

REPOSITORY        TAG        IMAGE ID          CREATED       VIRTUAL SIZE
hello-world     latest     af340544ed62      2 weeks ago       960 B
To download another image you can use the command pull.
$ docker pull centos

Using default tag: latest
latest: Pulling from library/centos
f1b10cd84249: Pull complete
c852f6d61e65: Pull complete
7322fbe74aa5: Pull complete
Digest: sha256:90305c9112250c7e3746425477f1c4ef112b03b4abe78c612e092037bfecc3b7
Status: Downloaded newer image for centos:latest
Now if you execute the command docker image again, it will be possible to see the new image that we downloaded from centos.
$ docker images

REPOSITORY        TAG        IMAGE ID          CREATED       VIRTUAL SIZE
hello-world     latest     af340544ed62      2 weeks ago       960 B
centos          latest     7322fbe74aa5      9 weeks ago       172.2 MB
To execute a container with an image is necessary to use the command run, and if this image do not exist in your computer, docker will download it automatically for you.
The command below will build and execute a container with debian image. The options “i” and “t” are usually combined to execute a process in an interactive way, like it was a shell.
$ docker run -i -t debian:8 /bin/bash
The command docker ps allows you to see all the containers that are running.
$ docker ps
CONTAINER ID    IMAGE     COMMAND      CREATED   STATUS   PORTS      NAMES
cf52245c4c32   debian:8  "/bin/bash"  5 min ago  Up 5 min      desperate_mccarthy
To make a container to stop running the command stop is used, it is necessary to say the cointainer’s ID. Notice on the docker ps command there is a column called CONTAINER ID.
$ docker stop cf52245c4c32
cf52245c4c32
If a stop command exists, a start command does as well, right?
$ docker start cf52245c4c32
cf52245c4c32
Now that our container is up again, it is possible to connect to it using attach command.
$ docker attach cf52245c4c32
root@cf52245c4c32:/#
If you don’t want an image anymore, it is possible to remove an image using rmi command.
$ docker rmi -f <IMAGE-ID>
Remember, your best friend is the help command.
$ docker <COMMAND> help
Publishing your images
Until now we used images available at docker hub. It is time to learn how to change, commit and publish an image. Just to remind, you have to be registered at docker hub.
Let’s download ubuntu image and install nginx.
$ docker run -i -t ubuntu:14.10 /bin/bash
root@281b3fcf24f2:/# apt-get update
root@281b3fcf24f2:/# apt-get install nginx
We can verify the image changes using diff command. To leave the container
without killing it you have to press: ctrl + p + q. Using command ps we can
see the container that is still running.
$ docker diff 281b3fcf24f2
The command result will show us everything we changed, add or removed. To save this
modifications in the image we have to use the commit command.
$ docker commit b15765f0448b patito/ubuntu-nginx
6b5522a3b94dcd25d3b4afb84b5069008bc69643fc69fae9ea6254be909c904e
Let’s login at docker hub.
$ docker login
Username:
Password:
Email: benatto@gmail.com
WARNING: login credentials saved in /home/patito/.docker/config.json
Login Succeeded
Our changes have been saved at patito/ubuntu-nginx. Let’s run this image and export port 80. The port 8080 will be running at the host and the port 80 will be running at the container. Remember to start nginx.
$ docker run -i -t -p 8080:80 patito/ubuntu-nginx /bin/bash
root@68246cddc002:/# service nginx start
root@68246cddc002:/# ps aux
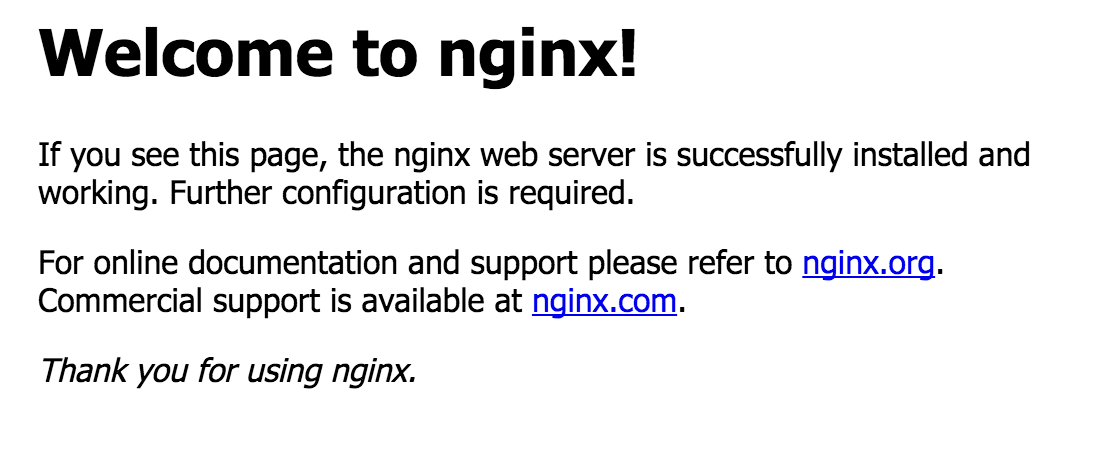
With the command ps aux in the container you will verify if the nginx is running.
If everything happened normally you can access your browser http://
$ docker push patito/ubuntu-nginx
You can login at docker hub and see your new image.

If you want to search images at docker hub, you can use command search.
$ docker search centos
To do the logout from docker hub use the logout command.
$ docker logout
Remove login credentials for https://index.docker.io/v1/
References
- Docker
- Friends